

0117 929 2104


Email Updates
Sign up for our newsletter for discount coupon codes and new product special offers
Small and valuable items like cash, gadgets, laptops, jewellery and documents are easy targets for thieves. Irreplaceable objects like antiques and keepsakes are equally vulnerable, not just to theft but also to fire. That is why many homeowners opt to buy a home safe, ensuring that their most prized possessions have an extra layer of protection.
However, there are many types of safes, and they come in a range of sizes. Choosing the right safe is a tricky task, and one which needs consideration, as a poorly installed safe can be rendered useless. Aside from considerations such as cost and the locking mechanism, a new safe owner needs to consider installation methods. Depending on the safe you want, installing the unit could vary from a quick job to a long process which requires professional assistance. Knowing these limitations beforehand can save you a lot of wasted time.
The table below shows a quick guide to different safe types, the amount of time they require to fit and which tools are needed. Finally, you can see which safes are best installed by a professional.
| Safe Type | Time Required | Tools Required | Proffesional Required |
| Free Standing Home Safe | 10 minutes | No special tools | Easy to complete |
| Bolt Down Home Safe | 20 minutes | Spanner or screwdriver, a masonry drill bit, pencil, tape measure, bolts and a drill | Moderately easy to complete |
| Rear Wall Fixing Home Safe | 20 minutes | Spanner or screwdriver, a masonry drill bit, pencil, tape measure, bolts and a drill | Moderately easy to complete |
| PAD4 Base Fixing Home Safe | 30 minutes | Spanner or screwdriver, a masonry drill bit, pencil, tape measure, bolts and a drill | May be difficult to complete |
| Security Cable Fixing Home Safe | 5 minutes | No special tools | Easy to complete |
| Locked to Base Plate Home Safe | 1 hour | Spanner or screwdriver, a masonry drill bit, pencil, tape measure, bolts and a drill | Moderately easy to complete |
| Fixed into a Wall Home Safe | 1 hour | Screwdriver, pencil, tape measure, stud finder, screws and a drywall saw | Difficult to complete |
| Floorboard Safe Home Safe | 1-2 hours | Pencil, saw, drill, shovel, trowel, plastic sheeting or weatherproof sealant | Very difficult to complete – professional recommended |
| Underfloor Safe Home Safe | 1-2 hours | Pencil, electric jackhammer, shovel, trowel, plastic sheeting or weatherproof sealant | Very difficult to complete – professional recommended |
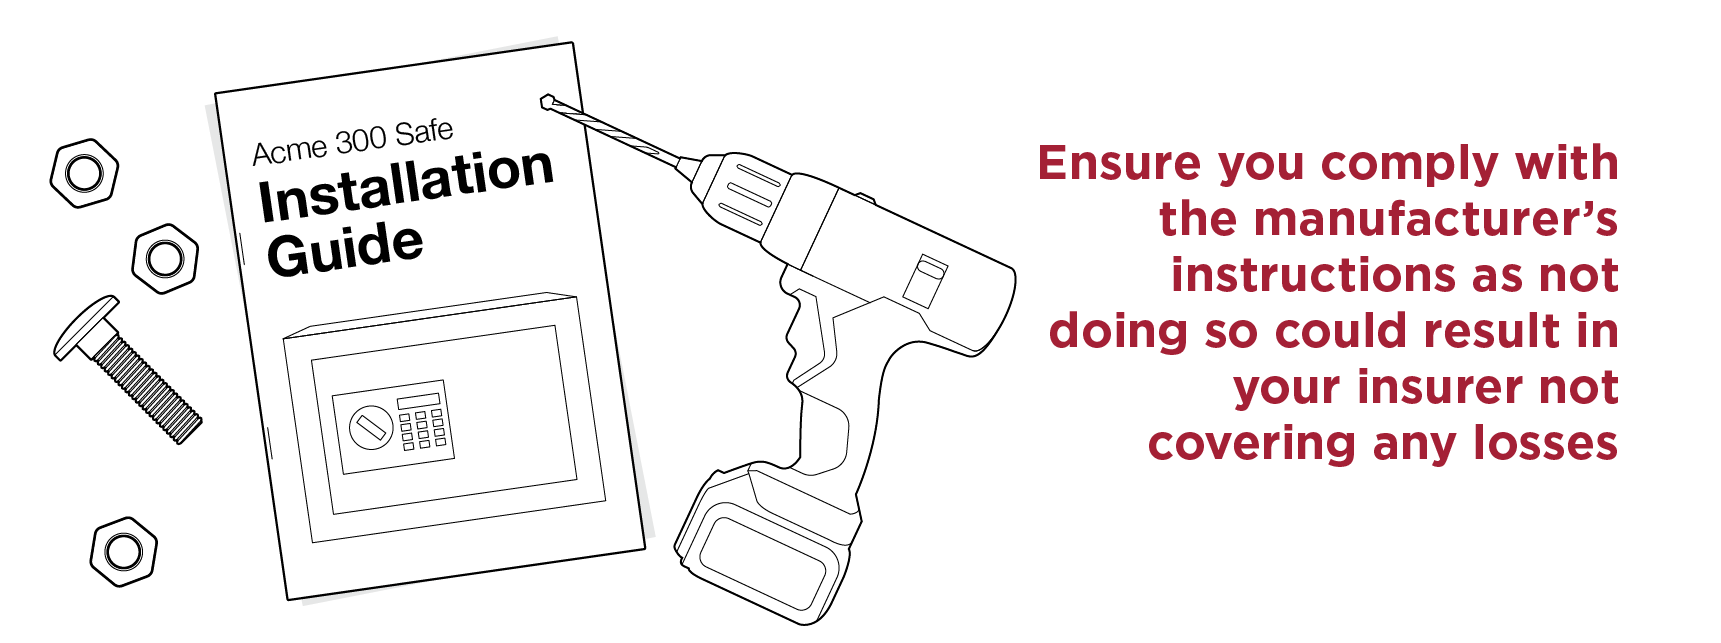
Remember that all safes must be securely fitted, by whatever guidelines the manufacturer sets. This often includes the use of specific, approved fittings. This is critical in ensuring that the safe works correctly (for example, cheap bolts might allow the safe to be prised free of the floor) but it is also necessary for insurance purposes. An insurer could reject a claim on the basis that you did not follow the manufacturer’s instructions.
The key to understanding the fitting process is to identify which type of safe you want. Each type serves a slightly different purpose and is suited to an individual task. For example, it may be more efficient to have a small, fire-proof safe for documents and a larger anti-theft safe for laptops. A typical home safe will cost around £70 to £450.
The two primary categories of safes are fire-resistant and burglar-resistant. Fire safes are typically given thinner walls with insulation, whereas other safes have thick walls but are less able to withstand heat. In an intense fire, the contents of a standard safe can get extremely hot and be destroyed in a matter of minutes. Safes have a fire rating which will tell you how many minutes they can last. You’ll also see a cash rating, which tells you the recommended total value of items to store in that safe; getting this right is important for insurance purposes.
The next way to categorise safes is the method of installation. These methods are worth understanding because you can end up wasting a lot of time and effort if you buy the wrong type. For example, if you get a wall safe and then find that your wall cannot support it. Many of these safes do not require professional assistance, but they may need certain tools. For each method, there follows a step-by-step guide to give you an understanding of the work involved.
| Installation Time: |
People Required: |
| Tools Required: |
|
A free standing safe can typically be installed in 10 minutes. You will require no special tools. This is a one-person job, but consider getting help if the safe is heavy. This fitting should be easy to complete.
The most common and typical type of safe, this is also the easiest to use. When you picture a simple, cube-shaped safe sitting on the floor, that’s a free standing safe. Unlike a fixed safe, this is not bolted to the floor or wall, so you simply have to place it wherever you desire. The benefit of this kind of safe is that it doesn’t need any special techniques to install, but on the downside, thieves can simply carry it away. Fire safes are usually free standing.
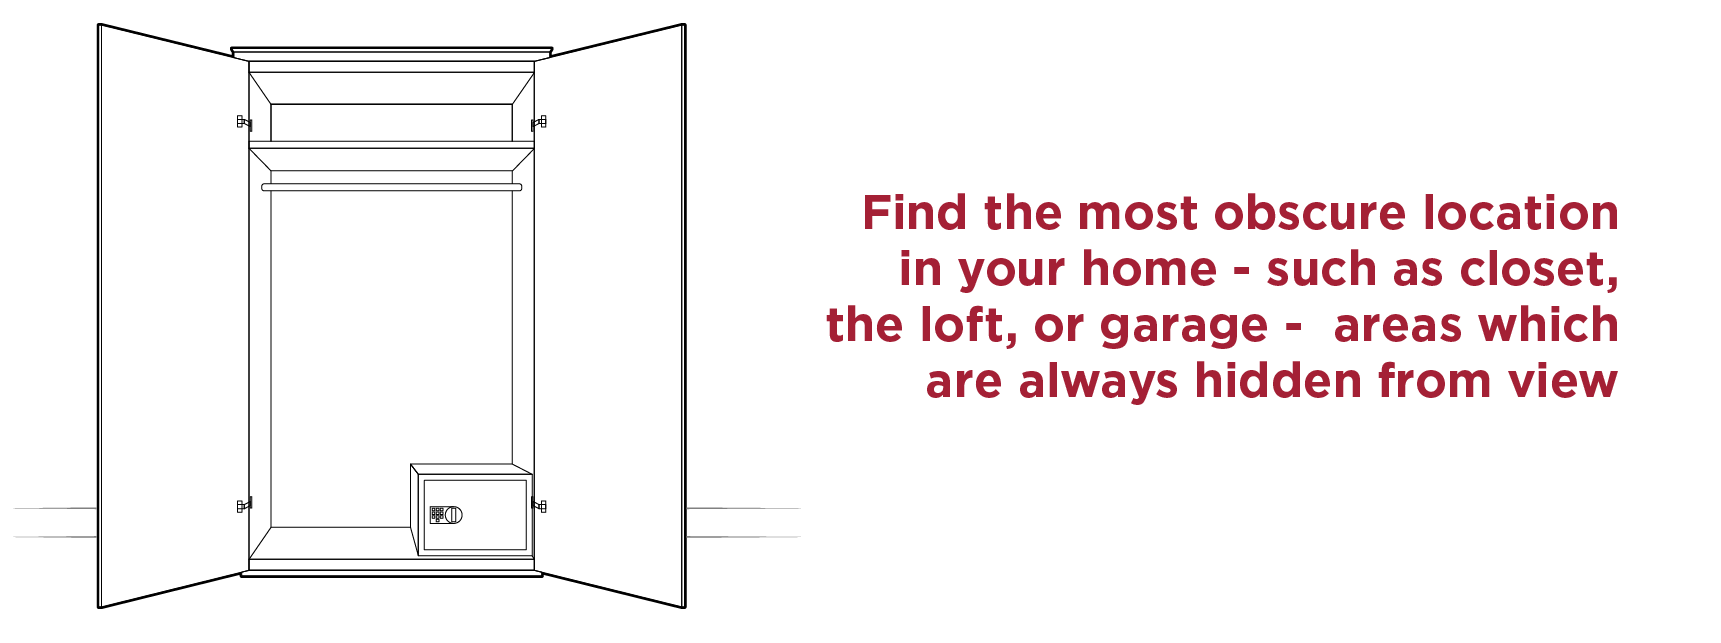
Though free standing safes do not have to be installed per se, location is worth considering for all safe types. You have a little more choice with a free standing safe. Typically, you should place a safe in the most inconspicuous location in your home. A closet is a good choice, or anywhere which hides the safe from view. The primary function of any safe is to cost a potential thief more time.
Once you have your ideal location, run over a quick checklist. Can this place support the weight of the safe? Ideally, you want solid floor joists to run underneath. Will it be too inconvenient to access regularly? Is it safe from falling? You should also check the manufacturer’s manual for any suggestions. Some will insist that nothing is kept on top of the safe, for example. The surface should also be level.
| Installation Time: |
People Required: |
| Tools Required: |
|
A bolt down safe can typically be installed in 20 minutes. You will require a spanner or screwdriver, a masonry drill bit, pencil, tape measure, bolts and a drill. This is a one-person job, but consider getting help if the safe is heavy. This fitting should be moderately easy to complete.
A bolt down safe is just like a free standing safe, except it is bolted to the floor. This means that more DIY is involved, but this safe cannot be easily removed. Though it’s not a difficult job, you might consider getting assistance if you’re not big on DIY or if the safe is quite heavy; safety comes first.
Check that you have all the tools you will need, plus all the parts that come with the safe. Many safes will come with the manufacturer’s approved bolts. Check that the bolts are supplied in the right amounts and that you have a masonry drill bit suitable for the surface you’re drilling.
You’ll have to select a place where the floor is even and solid (ideally concrete, or floor joists), so the bolts can rest securely. You should also check the building plans to make sure that the location can bear the weight. Check for electric wires and piping before you begin. Working within these restrictions, try to place the safe in a hidden spot, to make life harder for thieves.
Most safes will have pre-drilled fitting holes, so you can check these to see where the drill holes will need to go. Ensure that the safe will fit in the space you’ve chosen and the holes can be drilled easily and safely. Check that the safe’s door can open fully once it’s in place.
Clear away anything you don’t need from your chosen location. If you’re putting the safe against the wall, it’s often worth removing the skirting board, so that it can sit flush. Simply place the safe up against the wall and mark the board with a pencil, then remove the board, cut it down to size and reattach it. Carpet will also need to be removed, which you can do by placing the safe and cutting around the edge with a knife. You will find it much easier to fit the bolts if you’re working on the floor directly.
You can now mark the spots where you will drill. The easiest way to do this is by placing the safe in situ and marking through the existing drill holes. Double check that the marks line up with the holes, then finally, you can drill. You may find it easier to start with a small masonry bit and then widen with a larger bit. Measure the bolts and avoid drilling holes deeper than they need to be. Ensure that the holes go straight downwards.
You can now place the safe over the holes. Insert the expansion bolts or “RawlBolts” into the holes. Tighten the bolts with a spanner or screwdriver, depending on the bolts. These bolts will expand as you tighten them, to ensure the tightest fit possible. You may want to check that the safe sits right and opens correctly before finally tightening the bolts. Now you can insert any shelves you want inside the safe.
| Installation Time: | People Required: |
| Tools Required:OR | |
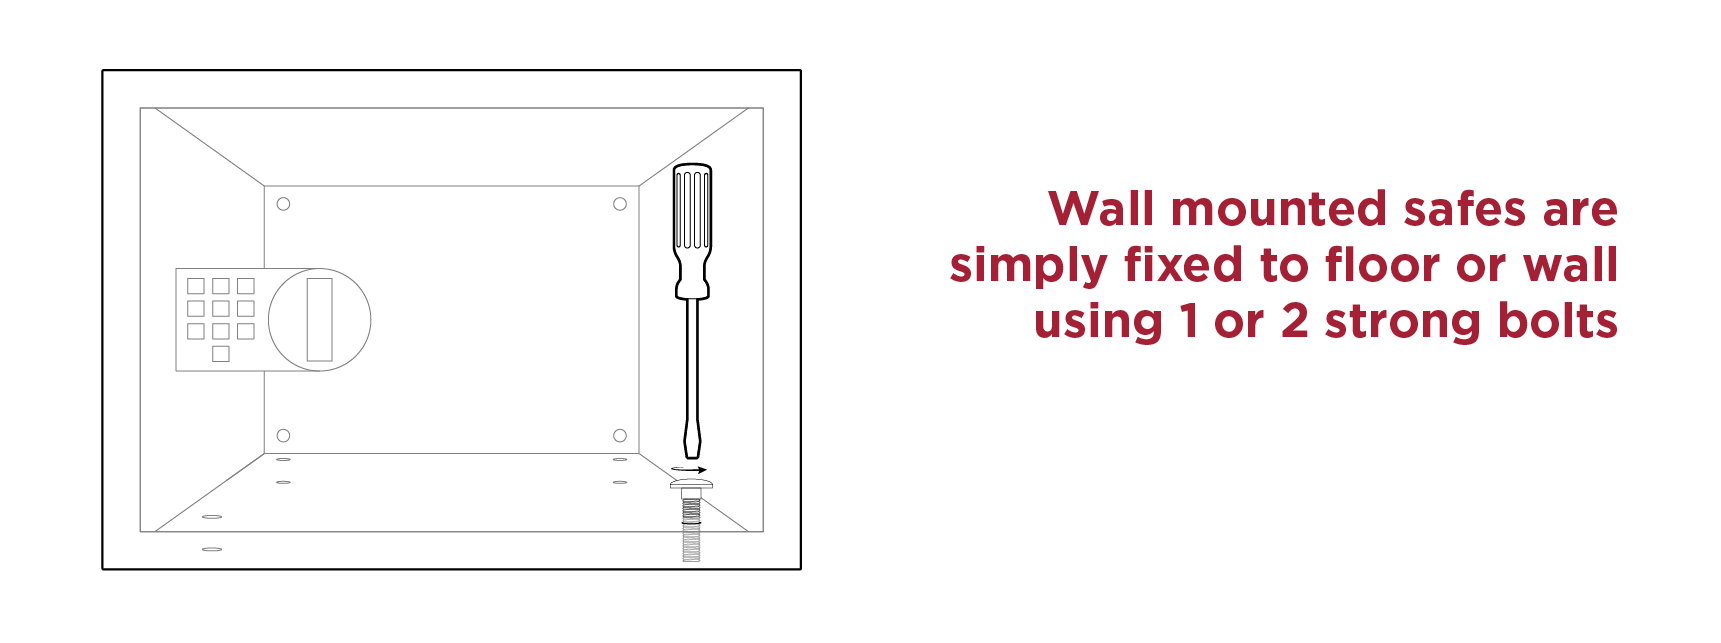
A rear wall fixing safe can typically be installed in 20 minutes. You will require a spanner or screwdriver, a masonry drill bit, pencil, tape measure, bolts and a drill. This is a one-person job, but consider getting help if the safe is heavy. This fitting should be moderately easy to complete.
A wall fixing safe is a good choice if you only have wooden floorboards, but you have a strong masonry wall to use. The safe is fixed to the wall in much the same way as a floor mounted safe is fitted. Though it’s not a difficult job, you might consider getting assistance if you’re not big on DIY or if the safe is quite heavy; safety comes first.
Check that you have all the tools you will need, plus all the parts that come with the safe. Many safes will come with the manufacturer’s approved bolts. Check that the bolts are supplied in the right amounts and that you have a masonry drill bit suitable for the wall you’re mounting against.
The benefit of a rear wall fixing safe is that the floor does not need to be drilled, but it still needs to be solid. You should check your building plans to ensure that the floor can support the weight of the safe. Ensure that the wall is sturdy and can take the strain. Ideally, the wall will be concrete or brick. Check that there are no electric wires or pipes behind the wall. Choose a place which is hidden and inconspicuous where possible, to cost thieves even more time.
The safe will typically have pre-drilled holes which will tell you where the corresponding bolts will go in the wall. You can measure these to help you find a location. You should check the safe in situ and make sure that the door has clearance to open properly.
Remove anything from the area that you don’t need. Since your safe will be mounted flush against the wall, you may have to remove a segment of the skirting board. Simply place the safe up against the wall and mark the board with a pencil, then remove the board, cut it down to size and reattach it. Carpet will also need to be removed, which you can do by placing the safe and cutting around the edge with a knife. This will make the safe sit evenly and more securely.
You can now mark the spots where you will drill. The easiest way to do this is by placing the safe and marking through the existing drill holes. Double check that the marks line up with the holes, then finally, you can drill. You may find it easier to start with a small masonry bit and then widen with a larger bit. Measure the bolts and avoid drilling holes deeper than they need to be. Ensure that the holes go straight into the wall at 90 degrees.
You can now align the safe with the holes. Insert the expansion bolts or “RawlBolts” into the holes. Tighten the bolts with a spanner or screwdriver, depending on the bolts. These bolts will expand as you tighten them to ensure the tightest fit possible. You may want to check that the safe sits right and opens correctly before finally tightening the bolts. Now you can insert any shelves you want inside the safe.
| Installation Time: | People Required: |
| Tools Required:OR | |
A PAD4 base fixing safe can typically be installed in 30 minutes. You will require a spanner or screwdriver, a masonry drill bit, pencil, tape measure, bolts and a drill. This is a one-person job, but consider getting help if the safe is heavy. This fitting may be difficult to complete.
PAD4 base fixing trays are devices used to add security to fire safes. Since fire safes are intended to be completely insulated, they cannot have holes for bolts. This would compromise the integrity of the fireproofing. However, if the safe does need to be bolted down, it can be affixed to a PAD4 tray- which does have the holes and can be bolted to the floor. This is more or less the same as fixing an ordinary safe, except that you must allow room for the dimensions of the tray. Adding a PAD4 base can improve the insurance rating of the safe.
Check that you have all the tools you will need, plus all the parts that come with the safe. Many safes will come with the manufacturer’s approved bolts. Check that the bolts are supplied in the right amounts and that you have a masonry drill bit suitable for the floor. You should find that a PAD4 safe comes with the necessary adhesive to bond the fire safe to the mounting tray.
A PAD4 safe will mount to the floor, so you can treat it like any floor-bolted safe. The only thing to bear in mind is that the tray may add a little extra width to the safe’s dimensions, so that must be factored in when measuring. You should check your building plans to ensure that the floor can support the weight of the safe, ideally placing it above joists. Check that this location does not have any electric wires or piping. Choose a place which is hidden and inconspicuous where possible, to cost thieves even more time.
The PAD4 tray will have pre-drilled holes which will tell you where the corresponding bolts will go in the floor. Measure these holes and ensure that there’s enough space. You should also check the safe in situ and make sure that the door has clearance to open properly.
Clear away anything you do not need from your chosen location. If you wish to put the safe flush against a wall, you may have to remove some skirting board. Simply place the safe, on its PAD4 tray, up against the wall and mark the board with a pencil, then remove the skirting board, cut it down to size and reattach it. Carpet will also need to be removed, which you can do by placing the tray in the desired location and cutting around the edge with a knife. This will make the safe sit evenly and more securely.
You can now mark the spots where you will drill. The easiest way to do this is by placing the tray in situ and marking through the existing drill holes. Double check that the marks line up with the holes, then finally, you can drill. You may find it easier to start with a small masonry bit and then widen with a larger bit. Measure the bolts and avoid drilling holes deeper than they need to be. Ensure that the holes go straight down.
You can now align the tray with the holes. Insert the expansion bolts or “RawlBolts” into the holes. Tighten the bolts with a spanner or screwdriver, depending on the bolts. These bolts will expand as you tighten them to ensure the tightest fit possible. You may want to check that the safe sits right and opens correctly before finally tightening the bolts. The next step is to fix the safe to the PAD4 tray, which will be explained in the tray’s manual. This is also known as a chemical bonding and involves applying an adhesive to the tray, then lowering the safe onto it. This is an industrial-strength substance, so be very careful! Give the adhesive plenty of time to bond. Finally, you can install any shelves that came with the safe.
| Installation Time: | People Required: |
| Tools Required:OR | |
A rear wall fixing safe can typically be installed in 5 minutes. You should not require any special tools. This is a one-person job. This fitting should be easy to complete.
Security cables are thick, braided steel cables which are fairly flexible and very hard to break or cut. These cables are ideal for securing anything with an unusual shape or size. Many people use them to protect laptops, or large, valuable tools. If your safe cannot be bolted down for whatever reason, this is the next best thing.
Make sure that you get a security cable that suits the job. There should be as little spare length as possible, just to give thieves less room to manoeuvre the safe. You can also check the fire resistance rating of the cable. Since fire safes cannot be directly bolted without reducing their efficacy, some users will employ cables instead. You can get different locking mechanisms too, from combinations to keys. Try to get a cable as secure as the safe. Otherwise, it will be the weak link in your defences.
Though a cable fixed safe does not need a sturdy floor or wall (so long as the floor can support the safe’s weight), it does need something sturdy to attach to. The ideal choice would be a steel pole or structure, which the cable can be looped around. Some will also use a large object, such as the holes in a steel desk or shelving. These are not rooted to the house, but they are big and bulky enough to prevent a thief from carrying the safe away. Where possible, you should find a hidden location which cannot be spotted easily, such as inside a cabinet.
The beauty of a cable fixing is that it only takes minutes. You simply have to thread the cable through a suitable hole on the safe, or around the bulk of the safe, then loop it around whatever you wish to anchor the safe to. Give the safe a good tug and twist in every direction to ensure that the cable won’t come loose. You must also make sure that the cable won’t interfere with the safe’s stability and that the door can still open fully.
| Installation Time: | People Required: |
| Tools Required:OR | |
A locked base plate safe can typically be installed in an hour, depending on the room or vehicle. You will require a spanner or screwdriver, a masonry drill bit, pencil, tape measure, bolts and a drill. This is a one-person job when installing in a home or retail unit, but putting the safe in a vehicle is a job for a professional mechanic. For a home fitting, this process should be moderately easy to complete.
A base plate is added to a safe to give it a little more mobility This is a system often used with vehicle safes or in offices and shops, but can be used anywhere. Essentially, the base plate is bolted down instead of the safe itself, then the safe is locked into the base plate. This allows the safe to be temporarily unlocked and moved, so cash can be transported. In a home, it would allow for easier access to the contents. The fitting process is more or less the same as with an ordinary safe, except that you must allow room for the dimensions of the base plate. Fixing a base plate safe to a vehicle is more complex and should be done by a mechanic.
Check that you have all the tools you will need, plus all the parts that come with the safe. It’s worth being sure that you have all the correct bolts and shelves before installing. Many safes will come with the manufacturer’s approved bolts. Check that the bolts are supplied in the right amounts and that you have a masonry drill bit suitable for the floor.
A locked base plate will mount to the floor, so you can treat it like any floor-bolted safe. You should check your building plans to ensure that the floor can support the weight of the safe, ideally placing it above joists. Check that the location does not have any electric wires or piping. Choose a place which is hidden and inconspicuous where possible, to make life harder for thieves.
The base plate will have pre-drilled holes which will tell you where the corresponding bolts will go in the floor. Measure these holes and ensure that there’s enough space. You should also check the safe in situ and make sure that the door has clearance. Safes with protruding dials or keypads often need a little more space.
Remove anything that you don’t need from the area. If you wish to put the safe flush against a wall, you may have to remove some skirting board. Simply place the safe, on its base plate, up against the wall and mark the skirting board with a pencil, then remove the board, cut it down to size and reattach it. Carpet will also need to be removed, which you can do by placing the plate in the desired location and cutting around the edge with a knife. This will make the safe sit more evenly and securely.
You can now mark the spots where you will drill. The easiest technique for this is to place the base plate in situ and mark through the existing drill holes. Double check that the marks line up with the holes, then finally, you can drill. You may find it easier to start with a small masonry bit and then widen with a larger bit. Measure the bolts and avoid drilling holes deeper than they need to be. Ensure that the holes go straight down.
You can now align the base plate with the holes. Insert the expansion bolts or “RawlBolts” into the holes. You may find that the manufacturer supplied their recommended bolts. Tighten the bolts with a spanner or screwdriver, depending on the bolts. These bolts will expand as you tighten them to ensure the tightest fit possible. You may want to check that the safe sits right and opens correctly before finally tightening the bolts. The next step is to lock the safe onto the plate, which will be explained in the manual. This is typically a key locking mechanism and should be quick and easy to use, allowing you to lift the safe out of its anchor.
| Installation Time: | People Required: |
| Tools Required:OR | |
A wall mounted safe can typically be installed in an hour. You will require a screwdriver, pencil, tape measure, stud finder, screws and a drywall saw. This job can be done with one person, but two is ideal, as the safe will need to be lifted into place and held there. This fitting can be difficult to complete.
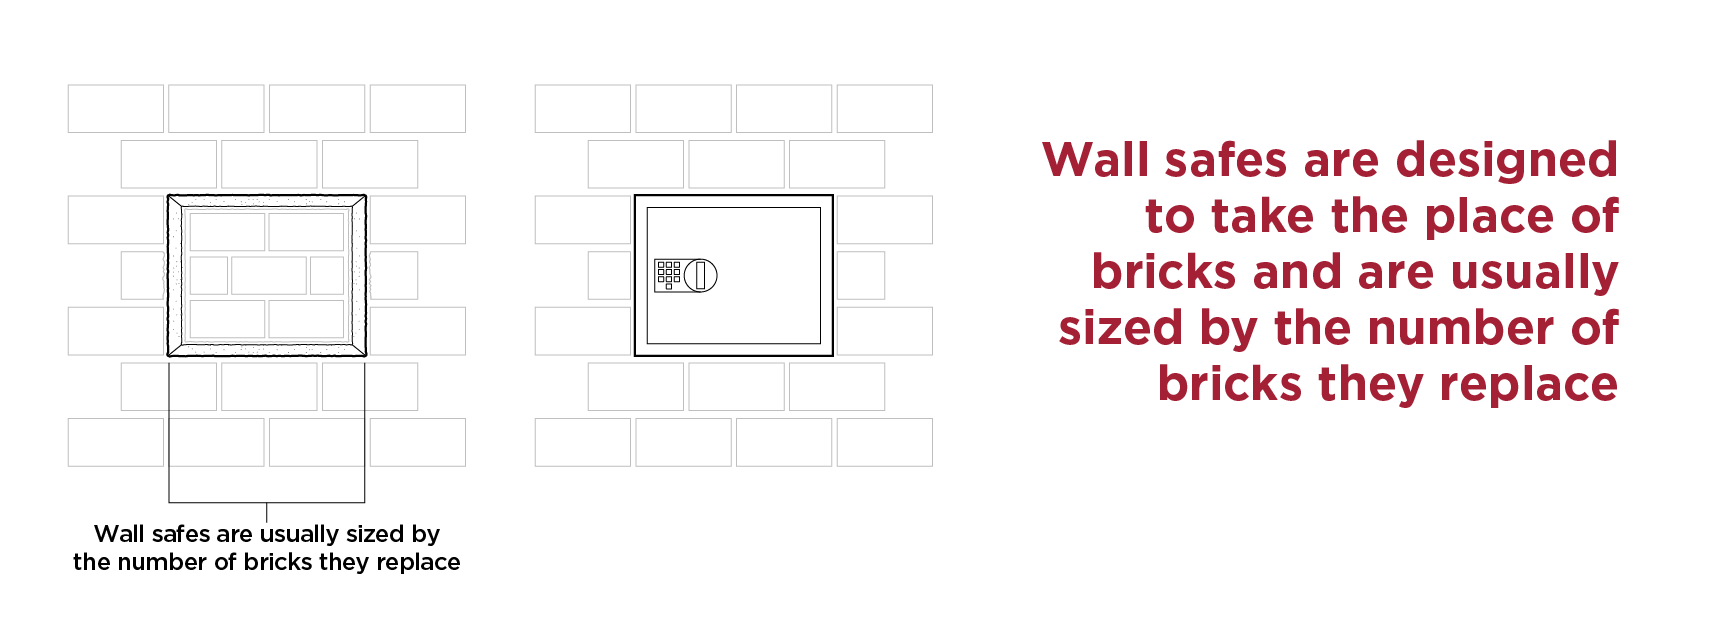
Fixing a safe into a wall is a very neat way to mount a safe, as it will take up a lot less room in your home than a free standing safe and be much easier to hide from view. A wall mounted safe certainly cannot be carried away- not without creating a lot of disturbance. However, the installation of a wall safe is difficult and may be best suited to a professional, as it involves intrusive DIY. A wall safe will usually be sized based on how many bricks it replaces in the wall; for example, a 2 brick safe fits in the gap left by 2 bricks.
Check that you have all the tools you will need, plus all the parts that come with the safe. It’s worth being sure that you have all the correct screws and shelves before installing. Many safes will come with the manufacturer’s approved fittings. Depending on where you install your wall safe, you may need a drywall saw to cut into the wall and a stud finder, a small electronic device which will tell you where the wall contains supports.
Wall safes are a little trickier to place, compared to a standard floor safe. You will need to find a wall with a suitable space, which ideally is a section of drywall with a gap between two studs, or vertical supports. This limits your choices. You should also check that this location does not have any electric wires or piping behind the wall. Choose a place which is hidden and inconspicuous where possible, to cost thieves even more time. You should also check that the door has clearance to open wide.
Use your stud locator to find a wall stud. The idea is to locate two studs with a wide, empty space between them, into which the safe will go. Measure up to the desired height from the floor, then make a mark. From here you can use the drywall saw to cut out an opening between the two studs on the wall, according to the measurements of your safe. You should carefully cut this opening to avoid any damage to electrical wiring. The opening, which should extend ¼-inch beyond the studs, can be filled with wood shims or plywood strips.
If you’re installing a safe into a brick wall, you will instead need to remove bricks from the wall. This is a more difficult task as it involves using powerful saws like a skill saw or reciprocating saw to cut away single bricks without damaging the integrity of the wall.
You are now ready to insert the safe into the opening. With the door of the safe open, insert it into the opening and press against the wall. Be wary because the door can be the heaviest part since it contains the lock. You may find it helps to have a second person to hold the safe in place so that you can be free to fasten the safe to the studs. This is typically done with large screws. In the case of a brick wall, you can simply slide the safe into the hole. You may use concrete to fill in any gaps. The rim of the safe’s front plate should cover up the edges of the hole.
| Installation Time: | People Required: |
| Tools Required:OR | |
A floorboard safe can typically be installed in an hour or two, but this does depend on the state of your flooring. You will require a pencil, saw, drill, shovel, trowel, plastic sheeting or weatherproof sealant. This job can be done with one person, but it’s often recommended to consult a contractor first if you do not have experience in this level of DIY. This fitting can be very difficult to complete and is typically done by a professional.
Floor safes are typically installed in concrete, but can be installed in wooden floorboards, provided there’s a large enough cavity underneath. This section deals with floorboard installations. A wooden floor has the advantage of not needing a jackhammer to break through, though you may still have to do some digging if the space underneath the boards isn’t deep enough. Floor safes are very secure and can be hidden easily using a rug, furniture or even false floorboards.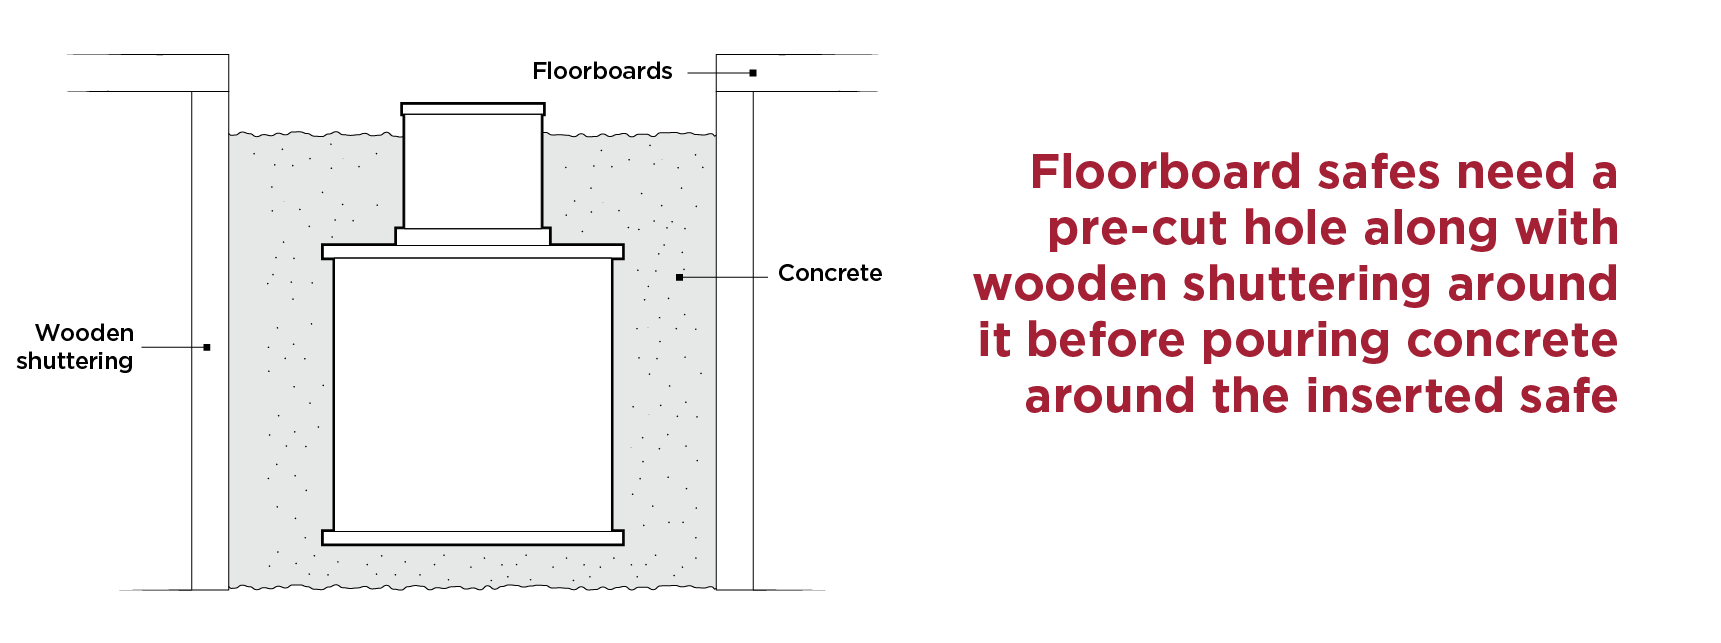
Check that you have all the tools you will need, plus all the parts that come with the safe. You will need to mix concrete for this job, so it’s important to understand how to do this safely and correctly. You may also wish to procure a weld mesh, which can go around the safe to make it harder to attack.
A floorboard safe requires a very specific area. The floorboards need to be sturdy enough that cutting away a section or removing boards won’t cause sagging, but there also has to be a significantly deep space underneath to house the safe. Some digging may be required. You must also ensure that the floor does not contain any pipes or wiring. The ideal location will also be easy to hide and inconspicuous. You should consider how you’ll hide the safe, while ensuring that it won’t be discovered by accident. Also ensure that the safe’s dial will be facing you once it’s in place.
Begin by marking the dimensions of the floor safe on the floorboards with pencil. You should leave an extra width of four inches or more on each side of the marking (some aim for twice the safe’s size). This gives you room to manoeuvre and a manageable space to fill with concrete. You can now saw along those marks, leaving a roughly square hole. You may find it easier to begin by drilling a hole. Once you have the hole, dig deeper into the earth if needed. Typically, you want a hole around three inches deeper than the safe’s actual height. Now, you need to line the hole with wooden shuttering, so that the concrete has a defined space to fill. You are essentially making a sunken box. To prevent any build-up of moisture, line the hole with a plastic sheeting or weatherproof sealant.
Begin by pouring a small foundation of concrete, which is why the hole is ideally a little deeper than the safe. Be very careful, as too much will cause the safe to protrude from the hole. Once this is set, you can gently lower the safe into the hole. Ensure that the safe is sitting just how you want it, facing the right way and level with the floor. You can now fill the rest of the role, around the sides of the safe. You may also use a stick to stir the concrete and pour little at a time. Use a trowel to smooth and level up the concrete. Once the concrete is dry, you can remove any excess concrete from the floor. The safe is now ready to use.
| Installation Time: | People Required: |
| Tools Required:OR | |
An underfloor safe can typically be installed in an hour or two, but leave extra time for the concrete to dry. You will require a pencil, electric jackhammer, shovel, trowel, plastic sheeting or weatherproof sealant. This job can be done with one person, but it’s often recommended to consult a contractor first if you do not have experience in this level of DIY. This fitting can be very difficult to complete and is typically done by a professional.
Floor safes can be installed into wooden floorboards, but typically it’s recommended to build them into solid concrete floors. This section deals with concrete installations. A floor safe is very secure and easy to hide, plus it takes up hardly any room in your home. This makes it a very attractive type of safe, but it does require a big construction job. Most floor safes are fitted by professional builders. However, if you have an understanding of building methods, it can be done by yourself.
Check that you have all the tools you will need, plus all the parts that come with the safe. You will need to mix concrete for this job and you’ll need a jackhammer to break into the floor. Ensure that you understand the safe handling of these items. You may also wish to procure a weld mesh, which can go around the safe to make it harder to attack.
Floor safes need to go into a solid floor with enough space for the safe and a few inches extra on all sides. You should ensure that the floor is solid and does not contain any pipes or wiring. The ideal location will also be easy to hide and inconspicuous. You should consider how you’ll hide the safe, such as under a rug or furniture while ensuring that it won’t be discovered by accident. Also, ensure that the safe’s dial will be facing you once it’s in place.
First mark the safe’s body shape on the floor with a pencil. You should leave an extra width of four inches or more on each side of the marking (some aim for twice the safe’s size). Use the jackhammer to break the concrete along these markings, then use a shovel to dig deeper. A typical technique is to dig around three inches deeper than the safe’s actual height. To prevent any build-up of moisture, line the hole with a plastic sheeting or weatherproof sealant.
Begin by pouring a small foundation of concrete, which is why the hole is ideally a little deeper than the safe. Be very careful, as too much will cause the safe to protrude from the hole. Once this is set, you can gently lower the underfloor safe into the hole. Ensure that the safe is sitting just how you want it, facing the right way and level with the floor. You can now fill the rest of the role, around the sides of the safe. You may also use a stick to stir the concrete and pour little at a time. Use a trowel to smooth and level up the concrete. Once the concrete is dry, you can remove any excess concrete from the floor. The safe is now ready to use.